


%20(1).avif)


Webinars
Featured Blog
Guide to building an API developer portal that truly increases adoption
An API developer portal is the gateway through which engineers discover, test and integrate your services.

TL;DR
Purpose of a great portal: Drives real API adoption by making it easy for developers to discover, try, and integrate APIs quickly, not just host documentation.
Must-have features: Searchable API directories, self-service onboarding, interactive docs, playgrounds or sandboxes, SDKs, and well-structured versioning.
Ecosystem integration: A portal cannot live in isolation and must connect with API gateways, identity/SSO systems, analytics dashboards, and CI/CD workflows so it is part of the developer workflow.
Build vs. buy decision: Evaluate required features, time to launch, and ongoing maintenance and governance before committing to either path.
Business outcome: The right portal supports growth, controls API sprawl, enhances developer experience, and delivers higher ROI from your API program.
Book a Demo Now to get started with DigitalAPI Developer Portal!
A purpose‑built solution offers automated metadata generation, granular access controls and real‑time analytics, so you can enforce security policies without slowing adoption and continuously optimise based on usage patterns. Moreover, LLM‑friendly schema markup and semantic metadata ensure your APIs surface in both search results and AI‑driven workflows. In short, the right portal doesn’t just host your APIs; it drives sustained adoption and ROI.
What is a developer portal and why does it matter?
A developer portal is a centralised web interface that aggregates your API catalogue, interactive documentation and onboarding tools into a single, cohesive experience. It serves as the primary touchpoint for engineers to discover, understand and try your services without friction. By providing interactive developer portals, code snippets and SDK downloads, it accelerates integration from day one. Here’s why it matters so much.
1. Enhanced discoverability
A well‑structured portal organises APIs by domain, version and use‑case, making it effortless for developers to locate the right interface. Rich search capabilities, full‑text and semantic, ensure even obscure endpoints surface quickly. Clear tagging and categorisation further reduce time-to-first-call. This discoverability directly correlates with higher adoption rates.
2. Accelerated onboarding
Self‑service signup and automated API‑key provisioning eliminate manual requests and approvals. Embedded OAuth flows and role‑based access controls allow new users to start testing within minutes. Step‑by‑step tutorials and code examples guide developers through their first integration. Faster onboarding means quicker proof‑of‑value and stronger initial engagement.
3. Improved developer productivity
Interactive documentation generated from your OpenAPI spec frees developers from toggling between docs and code. Dynamic code‑snippet rendering in multiple languages adapts to individual preferences. SDK generation and version management handle boilerplate, letting engineers focus on core logic. Higher productivity translates into more integrations in less time.
4. Self‑service sandboxing
Integrated “try‑it” consoles and disposable sandbox environments let developers validate requests without affecting production. Real‑time feedback on request/response payloads deepens understanding of API behaviour. Sandboxes coupled with mock data simulate realistic scenarios, reducing later troubleshooting. Self‑service testing removes friction that often stalls adoption.
5. Community engagement
Forums, Q&A sections and embedded chatbots foster peer support and knowledge sharing. Developer persona profiles and contribution badges incentivise meaningful participation. Regularly updated tutorials and code labs keep the community active and invested. A vibrant community turns users into advocates, extending your portal’s reach organically.
6. Data‑driven optimisation
Built‑in analytics track key metrics, API calls, latency, error rates and session durations to reveal usage patterns. Dashboards and alerts surface anomalies, guiding rapid fixes and feature enhancements. A/B testing of documentation layouts or onboarding flows helps refine UX iteratively. Continuous optimisation based on real data ensures sustained adoption growth.
Get started with DigitalAPI's developer portal today. Book a Demo!
Which metrics truly measure API adoption success?
Measuring API adoption means looking beyond raw call counts to understand developer engagement, productivity and satisfaction. The right metrics combine usage patterns, onboarding speed and quality signals to paint a full picture of adoption health. Here are the core indicators that matter:
- Active developer count: Track the number of unique developers making at least one successful API call each month. This shows who’s actually using your APIs versus those who just signed up. A growing active developer base indicates that more engineers find real value and are returning beyond initial trials.
- Time‑to‑first‑call: Measure the elapsed time from developer signup to their first successful API request. Shorter times reflect a smooth onboarding flow, clear documentation and intuitive “try‑it” consoles. Reducing this metric accelerates proof‑of‑value and boosts early engagement.
- Total & peak API call volume: Look at both cumulative API calls and spike patterns over defined periods. Rising call volumes signal deeper integration and broader usage across applications. Monitoring peaks also helps you assess capacity needs and identify events (like new feature launches) that drive adoption.
- Success vs. Error rate: Calculate the ratio of successful responses to client‑side errors (4xx) and server‑side errors (5xx). Low error rates imply reliable, well‑understood APIs and effective documentation. Spikes in errors flag areas where docs or SDKs may need improvement to prevent churn.
- Developer retention & churn: Determine what percentage of developers continue making calls month over month. High retention means your APIs remain valuable after the initial use. If churn is high, investigate friction points, missing features, outdated docs or performance issues that erode sustained adoption.
- Support ticket & community activity: Count support requests, forum posts and chat interactions per active developer. Healthy activity, balanced between questions and peer answers, indicates an engaged community. A sudden surge in basic queries may reveal gaps in documentation or onboarding guidance.
- Time‑to‑value (Feature adoption rate): Measure how long it takes for developers to adopt specific key endpoints or advanced features after initial integration. Faster feature uptake demonstrates clear use‑case communication and effective code samples. Tracking this helps prioritise improvements in tutorials and SDKs.
How do you create interactive, OpenAPI‑driven documentation?
Interactive, OpenAPI‑driven docs let developers explore, test and understand your APIs directly in the portal, no copy‑paste required. By leveraging a well‑structured OpenAPI specification and a dynamic rendering engine, you turn static docs into an executable playground. Use this step‑by‑step process to build docs that inform and engage:
- Define a complete OpenAPI specification: Draft a machine‑readable OpenAPI (v3.x) document covering every endpoint, parameter, request body and response schema. Include clear descriptions, example requests and error responses, plus your security schemes (OAuth2 flows, API keys). A precise spec becomes the single source of truth for both your docs and tooling.
- Choose a documentation generator: Select an interactive renderer such as Swagger UI, Redoc or Stoplight Elements. These tools parse your OpenAPI file and present it as expandable sections, complete with auto‑generated “try it” consoles. Evaluate customisation options, like theming and layout, to match your brand and user experience standards.
- Host your OpenAPI spec and assets: Serve the YAML/JSON spec from a stable, versioned URL (e.g. /spec/v1.yaml) so multiple API versions coexist. Host any static assets (JavaScript, CSS, templates) via your portal infrastructure or a CDN. Versioning ensures backwards compatibility and clear differentiation between current and deprecated APIs.
- Embed interactive “try it” consoles: Configure your renderer to include live request forms that automatically inject API keys or OAuth tokens. Developers can tweak parameters, execute calls against a sandbox or production environment, and inspect real‑time responses. Secure these consoles by enforcing CORS policies and sanitising user inputs.
- Augment with code samples and SDK links: Auto‑generate or hand‑craft code snippets for popular languages like cURL, JavaScript, Python, Java, and display them alongside the console. Ensure snippets update in sync with user inputs. Provide links to downloadable SDKs or GitHub repositories for deeper integration examples and faster onboarding.
- Automate documentation builds: Integrate your OpenAPI spec into your CI/CD pipeline so docs rebuild on every spec change. Use tools like Redocly CLI or Swagger CLI to validate schemas, lint for best practices and deploy updated docs automatically, eliminating drift between your API implementation and its documentation.
- Version and archive historical specs: Maintain documentation for deprecated and legacy API versions in clearly labelled directories. Indicate which versions are current versus retired to prevent developer confusion. Offer migration guides that walk users through breaking changes and upgrade paths, preserving trust in your API lifecycle.
- Monitor and iterate based on usage: Instrument your docs with analytics to track which endpoints are viewed and tested most frequently. Collect feedback via ratings or comments and capture error logs from the “try it” console. Prioritise documentation improvements, adding examples, clarifying parameters or fixing errors, based on real user behaviour.
What’s the best way to enable self‑service onboarding & API key management?
A smooth self‑service onboarding flow lets developers obtain credentials and start testing without waiting for manual approvals. Automated API key issuance reduces friction while maintaining security controls. Follow these best practices to streamline access and keep keys safe:
- Define clear signup workflows: Require minimal registration fields, name, email and intended use to lower barriers to entry. Use email verification or OAuth single‑sign‑on to confirm identities without manual review. Present terms of service and usage tiers during signup so developers know limits up front.
- Automate key generation and provisioning: Immediately issue API keys upon successful signup via your portal’s backend. Use secure key‑generation libraries and store keys encrypted at rest. Display keys in a one‑time view plus copy‑to‑clipboard buttons to simplify retrieval and reduce support requests.
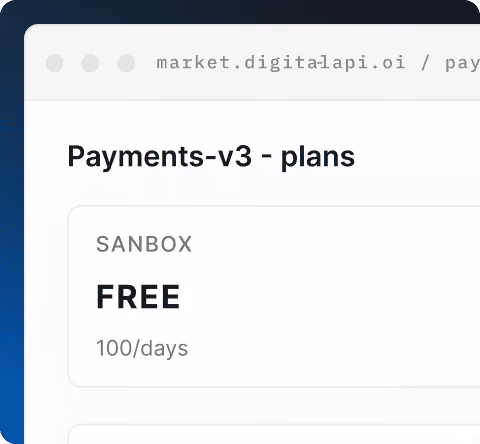
- Enforce tiered access policies: Offer multiple plans (e.g. free, developer, enterprise) with distinct rate limits, quotas and feature access. Automatically assign the appropriate tier based on signup data or developer selection. Clearly communicate each tier’s limits in the portal UI and API responses.
- Implement secure key rotation: Allow developers to regenerate or revoke keys at any time via the portal. Enforce periodic key expiration policies to minimise risk from leaked credentials. Provide clear migration guides so old keys gracefully phase out without disrupting integrations.
- Provide developer key dashboards: Display an interactive dashboard showing active keys, creation dates and last‑used timestamps. Include usage graphs per key so developers can monitor consumption by application. Offer exportable logs for auditing and troubleshooting.
- Trigger usage notifications and alerts: Enable configurable alerts for approaching rate limits, quota exhaustion or abnormal activity. Send email or webhook notifications when thresholds are crossed. This proactive approach helps developers adjust integration behaviour before hitting hard limits.
How can you build a sandbox for optimal developer experience?
An effective sandbox console provides developers with a safe, isolated environment to experiment with their API without impacting production. By integrating live request builders, mock data and real‑time feedback, you lower the barrier to first‑call success. Follow these steps to create a seamless, “try‑it‑now” playground that accelerates learning and drives adoption:
1. Design an isolated sandbox environment
Provision a dedicated sandbox instance that mimics your production API’s schemas and endpoints but uses mock or synthetic data. Isolate it behind separate credentials and URL namespaces (e.g. sandbox.api.yourdomain.com) so developers can’t inadvertently invoke live services. This separation ensures risk‑free experimentation.
2. Generate realistic mock data
Use contract‑driven tools or mock‑server frameworks (like Prism or WireMock) to auto‑generate example payloads based on your OpenAPI spec. Populate responses with representative field values and common edge‑case scenarios. Realistic data helps developers validate workflows and anticipate integration challenges.
3. Embed an interactive request builder
Integrate a UI component that renders form fields for every endpoint parameter, header and body property. Tie it to your mock server so users can modify inputs, submit requests and view responses in real time. Include syntax‑highlighted JSON viewers and response headers to enrich understanding.
4. Auto‑inject sandbox credentials
Upon signup, provision sandbox‑only API keys or OAuth tokens and configure the console to use them automatically. Hide sensitive fields and provide clear instructions on how to swap credentials for production. Seamless injection removes a major friction point in the developer journey.
5. Implement real‑time error feedback
Capture client‑ and server‑side validation errors in the console UI, annotating form fields with descriptive messages. Log errors centrally so you can identify common misconfigurations or misunderstood parameters. Immediate, contextual feedback reduces guesswork and accelerates success.
6. Track sandbox usage analytics
Instrument the sandbox console to emit events, endpoint accessed, payload size, and response time for every “try‑it” interaction. Surface these metrics in a dashboard so you can see which endpoints are most explored and where developers struggle. Use insights to refine documentation, mock data and console UX.
How do you enforce robust governance: Policies, rate limits & security?
Effective governance ensures your APIs remain reliable, secure and compliant as adoption scales. By codifying rules, controlling traffic and automating checks, you protect infrastructure and users alike. Implement these core practices to embed governance into every API interaction:
- Define and codify API policies: Translate business and compliance requirements into policy‑as‑code (e.g. data residency, payload validation). Store policies alongside your OpenAPI specs for versioning and auditability. Automate policy checks in CI/CD to block non‑compliant changes.
- Implement tiered rate limiting and quotas: Configure rate limits and quotas per developer or application tier at the gateway. Use dynamic thresholds to allow bursts while protecting backends. Expose limit headers so clients can adjust call rates before hitting caps.
- Enforce strong authentication and authorisation: Use OAuth 2.0 or JWT flows for identity and scope validation. Integrate your portal’s SSO or OIDC provider with API gateways for seamless token handling. Apply role‑based access controls to restrict sensitive operations.
- Automate security scanning and validation: Embed static analysis (Snyk, OWASP ZAP) into your build pipeline to catch vulnerabilities. Validate request schemas at the gateway to block malformed or malicious payloads. Schedule regular penetration tests to surface runtime issues.
- Monitor, audit and alert on policy violations: Stream auth failures, rate‑limit breaches and policy denials to centralised logs. Create dashboards and alerts for sustained violations or spikes in errors. Review audit logs regularly to detect misuse or emerging threats.
- Maintain a policy lifecycle process: Define workflows for policy creation, review, testing and retirement. Involve security, legal and product teams in approvals. Version and deprecate outdated policies with clear migration guidance to developers.
How can analytics & reporting turn portal data into actionable insights?
Analytics and reporting transform raw usage logs into strategic intelligence, enabling you to understand how developers interact with your portal and APIs. By instrumenting every touchpoint, from signups and key generation to “try‑it” sandbox trials, you capture granular events that map to the developer journey. This data foundation uncovers where users succeed, stumble or abandon, providing a clear roadmap for targeted improvements.
Begin by tracking essential metrics such as time‑to‑first‑call, endpoint hit counts, error rates and session durations. Annotate these events with contextual metadata, developer tier, documentation versions or SDK language to segment behaviour across personas. Comprehensive instrumentation ensures you can correlate spikes in errors with specific API revisions or pinpoint which code samples drive the most “try‑it” usage.
You need to visualise the results in real‑time dashboards that surface adoption trends and performance health. Combine line graphs of call volumes with heatmaps of documentation page views to identify high‑interest endpoints. Overlay error‑rate thresholds to immediately spot regression after deployments. Interactive filters let you drill down by geography or team, turning broad patterns into actionable insights.
Also, implement automated alerts for anomalies, such as sudden error spikes or quota breaches, so your team can react before developers hit dead ends. Integrate these alerts with your incident management tools or Slack channels to streamline response. Coupled with A/B testing of documentation layouts or onboarding flows, you continuously measure the impact of changes.
Finally, establish a feedback loop, review analytics in regular sprint retrospectives, prioritise enhancements based on developer friction points and retest iteratively. Over time, this data‑driven cycle boosts portal usability, accelerates integration velocity and drives sustained API adoption.
How do you structure your portal for LLM-friendliness with schema & semantics?
To ensure both search engines and AI assistants can parse and surface your portal’s content, you need clear semantic structure and embedded machine‑readable data. By combining HTML5 semantics with JSON‑LD schemas, you create signals that help LLMs understand your topics, Q&As and step‑by‑step guides. Follow these best practices to make your portal LLM‑friendly:
1. Embed JSON‑LD structured data
Use JSON‑LD to annotate pages with standard schemas like FAQPage, HowTo, and SoftwareApplication. Place the script in your <head> so crawlers and LLMs easily discover rich context. This markup explicitly defines questions, steps and metadata, improving your chances of appearing in AI‑powered answers.
2. Use meaningful, hierarchical headings
Adopt a strict <h1>–<h6> structure with descriptive, keyword‑rich text. LLMs rely on these headings to segment content and infer intent. Avoid generic titles like “Introduction”; instead, opt for “How do I onboard with OAuth 2.0?” or “Sandbox setup steps,” which guide both humans and AI parsers.
3. Author a well‑structured FAQ section
Curate a dedicated FAQ section using semantically marked <details>/<summary> or accordion components alongside FAQPage schema. Write each question in the exact phrasing developers use. Clear Q&A pairs help LLMs match user queries to your content, boosting “answer box” and snippet placements.
4. Annotate code samples with language tags
Wrap every code block in <pre><code class="language-xyz"> and include a data-language attribute if needed. Properly tagged snippets allow LLMs to distinguish between languages and generate accurate code completions. It also enables search tools to filter by language, improving developer discoverability.
5. Link related content with semantic relationships
Use <link rel="next">, <link rel="prev"> for multistep guides, and <a rel="canonical"> for versioned docs. Internally link tutorials, reference pages, and migration guides with descriptive anchor text. These semantic relationships help LLMs build a content graph and surface the most relevant resource.
6. Provide accessible alt text and ARIA labels
Ensure all images, diagrams, and interactive widgets include concise alt attributes and ARIA labels. Semantic descriptions let LLMs and screen readers interpret non‑text content correctly. Rich, context‑aware alt text also surfaces in AI‑driven summaries and voice‑assistant responses.
How DigitalAPI's API developer portal enables faster developer onboarding?
DigitalAPI's API Developer Portal is a self-serve, fully customizable branded developer portal built to offer a great developer experience for both internal teams, external developers, customers, partners, and AI agents.
It is a purpose-built solution for any organization that exposes APIs to developers, partners, or AI agents and has outgrown documentation-only tools, spreadsheets, or homegrown portals.
Instead of forcing teams to stitch together a docs tool, a key-management spreadsheet, a sandbox, a ticket queue, and a finance handoff, the portal connects discovery, testing, access, subscriptions, and analytics in one place. Developers and AI agents query the catalog in plain English and find any API by use case, name, or data type.
Unlike documentation-only or gateway native developer portals that offer a subpar experience, or open-source internal portal frameworks that take 3 to 6 months to set up and require huge engineering effort, DigitalAPI's Developer Portal handles the entire developer journey out of the box and can be up and running in 3 days. It's built agent-ready from day one, so AI agents consume your APIs through the same governance and audit trail as human developers.
Key features of DigitalAPI's Developer Portal
- Unified API catalog and search: Get a searchable registry of all available APIs in your organization in one searchable catalog, spread across multiple gateways, teams, repositories, and environments, with role-based visibility per audience.
- AI-powered search and API-GPT: Developers and AI agents find the right API by use case, name, data type, or plain English query. The same natural-language layer serves human developers and AI agents, which matters as agent traffic grows.
- Interactive API explorer and sandboxing: An interactive sandbox inside the portal with pre-filled auth tokens, saved history, and shareable examples. Collapses the gap from "discovered the API" to "made the first call" from days to minutes.
- Self-serve onboarding and subscription management: External developers sign up, accept terms, pick a tier, and get a key. Internal engineers request access and get routed to the API owner. Plan tiers, quotas, key rotation (90 or 120-day, per-user), and audit trails handle the full lifecycle.
- Usage analytics and visibility: Consumer dashboards show what's being called, by whom, and how often. Account managers see partner usage and expiry; internal teams see reuse and dependency maps.
- Monetization ready: Native billing for tiered subscriptions, pay-per-use, and overages, with usage data flowing directly into Stripe, NetSuite, or QuickBooks. Revenue recognition is audit-ready out of the box. Turns external APIs from a support cost into a revenue line without standing up a separate billing stack.
- Comprehensive SDKs: Auto-generated, downloadable code kits in Python, Java, JavaScript, Go, and .NET, distributed via NPM, Maven, and the package managers developers already use. One-click global language switching changes the programming language of every code snippet across the portal, so developers can integrate in their stack of choice.
- Governance and RBAC: Role-based access control with custom roles for internal engineers, external partners, and AI agents under one access model. IP allowlisting, scoped credentials, and immutable audit logs export to your SIEM, so every audience operates under the same compliant policies.
- Community and support: Integrated changelogs, FAQ sections, an embedded chatbot, and Salesforce-routed support ticketing keep developers informed and engaged. A built-in CMS lets a non-developer team publish guides, tutorials, and announcements without engineering.
- Automated, high-quality documentation and key management: Docs generate from your OpenAPI specs and stay current as APIs change. Keys provision on approval, rotate on policy, notify before expiry. Ends the cycle of stale docs and surprise key expirations.
- White-label branding without engineering: Custom domain, your colors, typography, and logos. A drag-and-drop theme editor and built-in CMS let a product or partner team publish updates without an engineering ticket. New tenant portals are provisioned in minutes.
- Agent and MCP ready: Every API auto-generates an MCP tool definition from its OpenAPI spec. Agents authenticate via OAuth M2M with scoped access and per-agent rate limits. One catalog, one governance model, one audit trail across human developers, partners, and AI agents.
Get started with DigitalAPI's developer portal today. Book a Demo!
Final thoughts
Choosing the right developer portal is a strategic investment in your API programme’s success. By prioritising interactive, OpenAPI-driven documentation, self-service onboarding, sandbox testing and robust governance, you remove friction at every stage of the integration journey. While, layering in real-time analytics and unified multi-gateway cataloguing can help you gain both visibility and control over your API estate.
At DigitalAPI.ai, we’ve seen organisations accelerate time-to-market, reduce support overhead and boost developer satisfaction simply by upgrading their portal capabilities. Whether you’re evaluating out-of-the-box solutions or building a custom interface, use these benchmarks to compare features, performance and extensibility. A portal that balances usability, security and LLM-friendliness doesn’t just host your APIs, it transforms them into a scalable, revenue-driving product.
FAQs
1. What features should a modern API developer portal include?
Essential features include an API catalogue/discovery, onboarding workflow, interactive documentation (playground/sandbox), self-service key issuance, analytics and monitoring, version management, search, SDKs/code samples and possibly monetisation. A gap-analysis of must-have vs nice-to-have helps decide build vs buy.
2. Why does a developer portal matter for API adoption?
A portal acts as the gateway for engineers to discover, test and integrate your services. By making APIs visible (search/tagging), reducing onboarding friction (self-service, keys), and providing realtime interactivity (docs + sandbox), you reduce time-to-first‐call, improve productivity and increase long-term engagement.
3. Should we buy a portal or build one ourselves?
It depends on your goals, budget, timeline and capabilities. If you need to launch quickly, have limited resources or require a mature feature-set, buying is often the quicker, lower-risk option. If you have unique requirements, strong internal teams and want full control, building may make sense. The right choice aligns with your API strategy and maturity.
4. How do we measure success of a developer portal?
Metrics to measure include time to first API call, number of active developers onboarding per month, rate of API reuse, support ticket reduction, API call volume growth and developer satisfaction scores. Tracking behavior (which endpoints are most viewed/tested) helps iterate features.
Dhayalan Subramanian is Associate Director, Product Growth at DigitalAPI, where he leads go-to-market and product growth for the company’s multi-gateway API management platform. His work focuses on helping large enterprises and mid-market cloud companies consolidate APIs across AWS, Azure, Apigee, Kong, MuleSoft, and other gateways into a single control plane for governance, discovery, monetization, and agent consumption.
Dhayalan brings 14+ years of experience across product strategy, enterprise architecture, and engineering leadership. Earlier in his career, he held senior roles at Encora (as Associate Architect and Technical Manager), Mindtree (Technology Lead), Tech Mahindra (Technical Lead), and Primus Analytics, where he designed integration frameworks and delivered enterprise-grade digital platforms for global customers.
At DigitalAPI, he works directly with platform, integration, and developer experience leaders at Fortune 500 organizations to operationalize unified API catalogs, developer portals, and MCP-ready APIs. He writes regularly on API developer experience, API governance, and AI agent architectures.
One email a fortnight. Worth opening.
A short digest of what we're writing, what we're learning from customers, and the handful of links you'd actually want from us. No tracking pixels.
.avif)